January 31, 2007

A Happy Shortcut

It was a busy night last week when I set out making one of our favorite meals. Pizza? No, our other favorite. Curry? No, no, the other one! Crêpes? No, okay…our fourth favorite!!! Enchiladas?! Ding Ding Ding!!

It was one of those nights where I really wanted to get done with it! And it occurred to me that my-source-of-all-things-excellent (i.e. Paul’s Mom) made a layered casserole out of the last few tortillas, chicken and onion that are inevitably leftover when making enchiladas. So, why not try it?

It turned out to be much easier and really tasty. If you’re crunched for time, or feel like a little Mexican lasagna, make it this way. In addition to the simple ingredients that usually fill my enchiladas – shredded chicken, red onion, and cheese – I added a layer of sour cream in the middle to add some richness and subdue some of the spiciness of the enchilada sauce. Black olives seemed like the perfect topper! This is a really basic version but you can obviously go crazy with the fillings. Beans, roasted chilis, jalepeno, or cilantro would be wonderful.

I like to serve these spiced up black beans on the side instead of rice or traditional refried beans. Simply sauté about ¼ cup chopped onion, ¼ cup chopped bell pepper in a tsp of olive oil. Sprinkle on a bit of chili powder and ground cinnamon. Stir in 1 can of drained and rinsed black beans, 2 Tbsp salsa and 1 tsp chopped chipotle chili (in adobo), if you like it spicy. Stir until warmed through and serve!

Enchilada Casserole

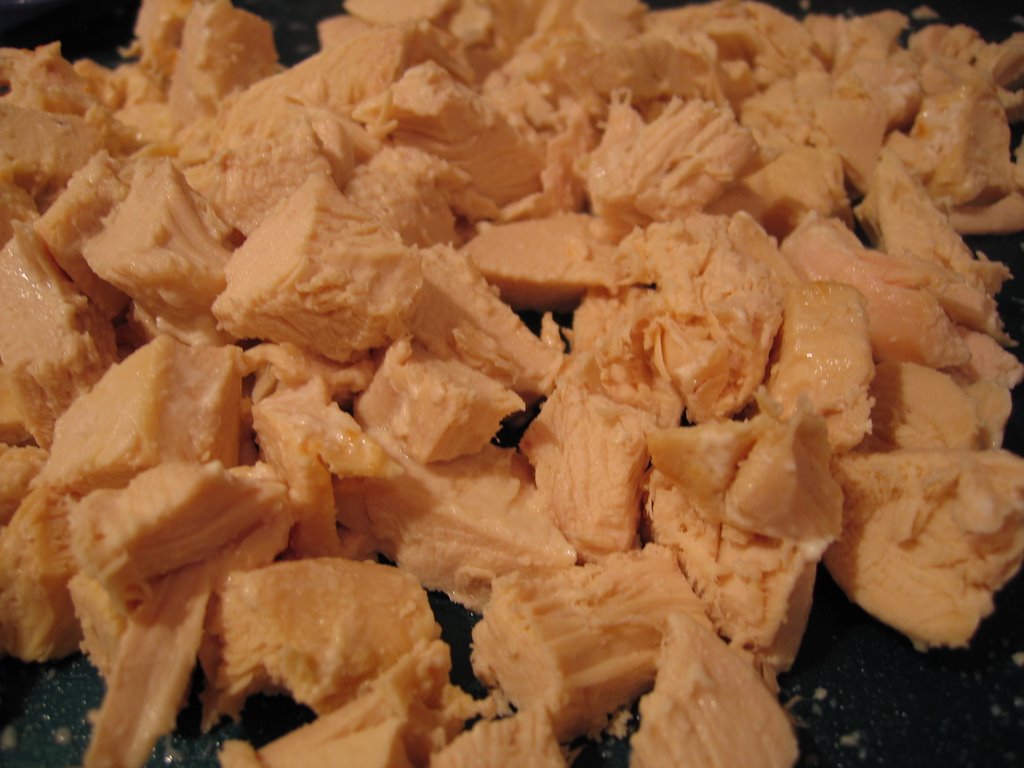
1 lb. boneless skinless chicken breasts or thighs, cooked and shredded
1 medium red onion, finely chopped
1 cup cheddar cheese, or a mixture of cheddar, monterey jack or other cheese
12 corn tortillas
2 (10-oz) cans red enchilada sauce
½ bottle beer (Negro Modelo or another amber or brown beer)
½ cup sour cream
¼ cup black olives

So, easy enough, right? Stir together the enchilada sauce and beer in a medium saucepan. Bring to a simmer; remove from heat and set aside.

Pour a ladle full of enchilada sauce in the bottom of square 8x8 baking dish. Place 4 tortillas in approximately one layer in the dish. They will overlap in the middle – that’s okay. Top with half the shredded chicken, half the onion, and 1/3 cup cheese. Ladle more enchilada sauce over this.

Layer 4 more tortillas in the dish. Spread the sour cream over the tortillas. Top with the other half of shredded chicken and onion and 1/3 cup cheese. Ladle more enchilada sauce over the dish and top with the remaining 4 tortillas. Ladle enough enchilada sauce over the entire casserole to evenly cover the tortillas (so there are no dry spots).

Sprinkle the olives and remaining 1/3 cup cheese over the top. Cover with foil and bake at 375 degrees F for about 30 minutes, or until bubbly. Remove the foil for the last 10 minutes of baking time. Serve with guacamole or sliced avocado and black beans. Serves 4.

January 29, 2007

What is that?!? Just trust me on this one...

You know, I don’t enjoy taking bad pictures. I really don’t. Especially when I need them to communicate that something actually tastes good. But, it happens, and it happened with this dish.

Casseroles are not easy to photograph. I’m sure most of you food bloggers have run into this. You simply cannot will a creamy sauce into a desired shape. (Granted, I haven’t been spending that much time on photos lately…isn’t it enough effort just to cook the damn food?!) I usually only put photos on this blog that are, at the least, minimally appetizing and, at best, drool inducing, so it pains me a little to present this and expect you to trust me when I say it’s delicious.

But, this is the sad state you find me in today. In case you are wondering what the hell is under that white shroud of custard, let me fill you in. Moussaka, a Greek dish, is usually a layered casserole of eggplant, ground lamb, and other vegetables in a tomato sauce spiced with cinnamon, allspice and sometimes cloves. This version is vegetarian, although it’s still quite substantial. Serving basmati rice on the side is a nice addition.

I really enjoyed this recipe from Epicurious. It could use a bit more depth of flavor in the sauce, but that could be easily remedied. I hope, despite the picture, you will try this! I enjoy the fact that this can be a main dish or a side dish, and you can make it a day ahead.

Vegetable Moussaka

3½ pounds eggplant
½ cup olive oil
1 large onion, chopped
1 cup celery, finely chopped
1 cup carrots, finely chopped
4 cloves garlic, minced
12 oz. Portobello mushrooms, cut into ½ inch pieces
1 tsp dried oregano
½ tsp ground cinnamon
¼ tsp ground allspice
¼ cup chopped fresh parsley
28-oz can crushed tomatoes
about 1 cup parmesan cheese

6 Tbsp butter
7 Tbsp all purpose flour
3 ½ cups whole milk
4 large egg yolks

Prepare the eggplant

  1. Slice the unpeeled eggplant into ½ inch rounds. Cover 2 baking sheets with paper towels. Salt both sides of the eggplant slices and place on the baking sheets for 30 minutes.
  2. Preheat the oven to 425 degrees F. Pat the eggplant rounds dry and oil the same baking sheets. Place the eggplant in a single layer and brush with ¼ cup of olive oil. Bake for 10 minutes; turn the eggplant and bake for 15 more minutes. Eggplant should be very tender.
  3. Reduce oven temp. to 350 degrees. Heat other ¼ cup of olive oil in a large sauté pan. Add onions, carrots, and celery and cook for 10 minutes or until very tender. Stir in the garlic and mushrooms and sauté over medium high heat for about 10 minutes, or until the water from the mushrooms evaporates.
  4. Stir in the oregano, cinnamon and allspice. Add the crushed tomatoes and simmer for another 10 minutes. Season with salt and pepper.
  5. Oil a 9x13 baking dish and layer half the eggplant slices in the bottom of the dish. Ladle half the tomato sauce over the eggplant. Sprinkle 3 Tbsp of the parmesan cheese over the sauce. Repeat by layering the remaining eggplant in the dish and topping it with the remaining sauce. Sprinkle with another few tablespoons of cheese.

Make the Béchamel

  1. Melt the butter in a medium saucepan. Stir in the flour to make a roux.
  2. After 3 minutes, gradually whisk in the milk. Whisk over medium heat until sauce is just brought to a boil. Remove from heat. Whisk in ½ cup of parmesan.
  3. Whisk together the egg yolks in a medium bowl. Gradually add ¼ cup of béchamel sauce at a time to the egg yolks, whisking vigorously so you don’t scramble the eggs. After about 1 cup of béchamel, you can usually add the rest without fear of scrambling.
  4. Pour this custard over the vegetables and sprinkle with extra cheese. Bake for 45 minutes, or until custard is set on top and lightly browned. Let cool 15 minutes before serving. Serves 8 generously.

January 26, 2007

Roasted Parsnips and Carrots with Thyme


So, to prove that I really do know what a parsnip looks like, I roasted some the other night. It was Genie who got me thinking about them again when she made the same mistake I almost did, by buying diakon radishes instead of parsnips. How parsnips and daikon radishes can bring such self-awareness and tolerance, I’ll never cease to be amazed. I mean, they make great vegetables, but counselors? I had my doubts.

Turns out parsnips are pretty good listeners. Daikon are too, although, I find Daikon, with their brilliant white exterior, to be a bit condescending. I mean, it listens, but is it judging? Daikon seem to be a bit superficial for my taste; the way they use their good looks to lure you away from other, say, tastier root vegetables, while the brownish, well-worn exterior of the parsnip shows life experience and tolerance, if you will. Sure, it’s kind of fugly, in that “my-cousin-was-born-with-an-antler” kind of way, but it’s a veg you can bring home to Mom and Dad.

So, now that you will be able to tell these two albino-looking carrots apart, what do you do with them? I’d only used parsnips once, in this delicious crepe filling. I was really impressed with this “new to me” vegetable since:

1) They are surprisingly sweet tasting
2) They are similar to (yet somehow better than) carrots
3) They are unexpected
4)
They are pleasing to my husband, unlike most vegetables.

This could be one of my favorite side dishes and I will surely make it again and again! Parsnips roast up so well – they caramelize and taste so yummy! I didn’t know how adding the carrots would turn out; I thought they might detract or compete with the parsnips, but I was really happy they were there. The glaze is delicious yet subtle; it enhances the flavor of the vegetables instead of just adding sweetness.

Enjoy!

Roasted Parsnips and Carrots with Thyme

2 lbs parsnips, peeled
1 lb baby carrots
5 Tbsp butter
3 Tbsp brown sugar
2 Tbsp balsamic vinegar
Salt
Pepper
3-4 Tbsp fresh thyme

Preheat the oven to 425 degrees F. Melt the butter in a small sauce pan over medium heat. Add the brown sugar and balsamic vinegar to the pan. Stir to combine just until sugar melts. Remove from heat.

Quarter the peeled parsnips lengthwise and cut into 2-inch pieces, roughly the size of the carrots. Place the carrots and parsnips on a baking sheet and drizzle with the buttery glaze. Sprinkle with salt and pepper and toss the vegetables until evenly coated with the butter.

Bake for 20 minutes. Sprinkle the thyme over the vegetables, stir to combine, and return them to the oven for another 10-15 minutes. The parsnips should be caramelized and tender. Serve warm. Serves 4 generously.

January 23, 2007

Curried Chicken Salad

I love a good chicken salad and a little curry here goes a long way to help make a tired mayo dressing perky again. I have to concede that the best curried chicken salad sandwich I’ve ever had was sold in Paris at the boulangerie on the corner of rue Poncelet and rue Laugier in the 17th arrondissement. It had the most delicious curry flavored mayonnaise I've ever tasted. If you're in the neighborhood to take in the large open market, make sure you check it out.

This is a great sandwich filling, but I also like it on salad greens, or as an hors d’oeuvres on toasted baguette slices or on individual endive leaves, as Paul’s mom served recently for a luncheon. When making dressings like this one, keep in mind that it may taste too pungent when tasted by itself, but once it coats the chicken and other ingredients, it won’t taste nearly as strong, so don’t be shy with the seasoning. Although, taste as you go and don’t be afraid to tweak the amounts to suit your taste.

Curried Chicken Salad
(recipe adapted from Food Network)

1 ½ lbs. boneless, skinless chicken breasts
½ medium red onion, finely chopped
2 stalks celery, finely chopped
½ cup green or red seedless grapes, roughly chopped
¼ cup chopped toasted almonds, optional
½ cup mayonnaise
3 Tbsp plain low-fat yogurt
2-3 tsp curry powder
2 tsp lemon or lime juice
2 tsp low-sodium soy sauce

Poach the chicken breasts in simmering water, covered, for about 15 minutes. Remove once the chicken is cooked through and let cool. Shred the chicken into bite-size pieces.

Stir together the mayo, yogurt, curry, lemon juice and soy sauce. Taste and adjust to your tastes. Add more curry for a stronger flavor. Mix together the shredded chicken, onion, celery, grapes and almonds. Coat with as much of the dressing as you like. Refrigerate for several hours before serving for the best flavor. Makes about 6 sandwiches.

January 19, 2007

Butternut Squash Soup

How about a nice bowl of soup to warm up in this cold weather?

The thing about butternut squash soup is that it’s sort of a blank canvas. Like sweet potatoes, it goes well with spicy chilis and sweeter spices like cinnamon or clove. Usually, I’m one to choose the spicy or more savory versions over the sweet ones. This soup has a little bit of everything. Not too spicy and not too sweet, it also has bacon, which adds a nice smoky flavor that plays off the squash quite well.

Not quite as easy as my Pumpkin Soup, this one isn’t bad. Can’t find butternut squash in your grocery store? No worries since this uses those convenient packages of frozen pureed squash that you can find in your freezer section. As with most soups, the flavors are much more pronounced the next day, so next time I’ll go easier on the cayenne. I also find that this soup becomes quite thick, so I would add another ½ cup of broth, or a bit more cream.

Hope you enjoy it!

Butternut Squash Soup
(recipe from Southern Living Magazine)

6 slices bacon (center cut is nice)
1 Granny Smith apple, peeled and chopped
1 large onion
2 carrots, peeled and chopped
2 celery stalks, chopped
2 cloves garlic, minced
4 cups low-sodium chicken broth
4 (12-oz) pkgs frozen butternut squash, thawed
1 ½ Tbsp honey
2-3 Tbsp lime juice
1 tsp salt (or to taste)
½ tsp black pepper
1/8 tsp ground nutmeg
1/8 tsp ground allspice
1/8 tsp ground cayenne pepper
¼ cup heavy cream

Cook the bacon in a large soup pot until crisp. Remove the bacon and some of the drippings, leaving about 2 Tbsp. of fat. Crumble the bacon once it has cooled and set aside.

Sauté the onion, carrots and celery in the bacon drippings for 5 minutes until the onion has softened. Add the apple and garlic and sauté 5 more minutes, stirring so that the garlic doesn’t burn. Add the thawed butternut squash and chicken stock. Bring the soup to a boil.

Reduce the heat and simmer for about 20 minutes, or until the carrots are cooked through. Puree the soup in a blender, in small batches, as my kitchen walls will tell you, as warm liquids has the tendency to explode. Return the soup to the pot and add the honey, lime juice, salt, pepper, nutmeg, allspice, cayenne and cream. Simmer for another 10 minutes.

Garnish the soup with crumbled bacon and, if desired, sour cream and a sprinkle of cayenne.

January 13, 2007

A Chicken Pot Pie to Cherish

This recipe is very special to me. It was this recipe that made me fall in love with chicken pot pie – both eating it and making it! What I love most about this recipe, other than the fact that it tastes damn good, is the method behind it. There are many, many ways to make chicken pot pie, but I find this to be one of the most accessible and straightforward recipes, while still being completely homemade. It’s one of those master recipes that are just really nice to have in your repertoire.

The only short cut this has is to use boneless chicken breasts and canned chicken broth, instead of boiling a whole chicken to have your own stock, as some recipes instruct, so I guess that’s cheating a little. If you want to take 2 days to make this, you could certainly do that the day before. Or, if you’re really on top of things, this would be super easy to throw together if you have homemade stock and pie crusts already in the freezer. In the other direction, you could always use a frozen store-bought puff pastry for the crust if you are short on time.

This recipe came from The Silver Palate Good Times cookbook from 1985. As you can see, it has a horrible cover, but contains good recipes! A few things that make this recipe unique are baking the chicken in the cream, which makes it extremely tender, and the tarragon works nicely here, which you don't see often in pot pie recipes. I love old cookbooks like this one, especially with their introductions for each recipe. “After a long day of work and late shopping, there is nothing more comforting than a chicken pot pie. Prepare it the night before and pop it in the oven to back when you get home.”

Chicken Pot Pie

Pâte Brisée:
(I used all butter to avoid trans fats)

2 sticks unsalted butter
2 ½ cup all-purpose flour
1 tsp salt
1 tsp sugar
3-6 Tbsp ice water

1. Cut up the butter into very small pieces and place in the refrigerator or freezer while you work with the other ingredients.

2. Place the flour, salt and sugar in a food processor and pulse to combine. Add the butter pieces and pulse until mixture forms coarse small crumbs, about 10 – 15 seconds. Add 3 Tbsp ice water to the mixture and pulse until dough comes together a bit and holds together when you pinch the dough between your fingers.

3. Pour the dough out onto a cutting board and shape into a ball without over working the dough. Divide into 2 pieces and shape each into a flat round disc. Wrap in plastic wrap and refrigerate for one hour.

Chicken Filling:

1 ½ - 2 lbs boneless, skinless chicken breasts
1 cup heavy cream
4 carrots, peeled and thinly sliced
3 small red potatoes, cut in 1-in chunks
(or 1 zucchini, sliced, per original recipe)
5 Tbsp unsalted butter
1 large yellow onion, chopped
¾ cup frozen green peas
5 Tbsp flour
1 cup chicken broth
¼ cup cognac or dry white wine
1 Tbsp dried tarragon
2 tsp fresh thyme (or 1 tsp dried)
1 tsp salt
½ tsp ground black pepper
1 egg
1 tsp water

1. Preheat the oven to 350 degrees F. Place the chicken in a baking dish in a single layer. Pour the cream over the chicken and bake for 25-40 minutes, depending on the size of the chicken breasts.

2. Remove the chicken from the cream, reserving the cream for the sauce. Once the chicken has cooled, cut it into 1 inch pieces.

3. Place the potatoes in a pot of cold water. Bring this to a boil. After 10 minutes, add the carrots and cook 5-10 minutes more until both the potatoes and carrots are fork tender. Drain and set the vegetables aside.

4. Melt the butter in a wide sauté pan, add the onions and cook until translucent. Sprinkle in the flour; stir and cook 5 minutes, but do not brown. Slowly add the broth to the onion mixture, whisking until the sauce smoothes out and thickens. (Which worked really well with my new flat whisk - a great tool!) Add the cream, cognac, tarragon, thyme, salt and pepper and cook 5 more minutes.

5. Add the chicken, potatoes, carrots and frozen peas to this sauce and mix gently. Pour mixture into a 2 quart casserole, soufflé dish, or large ramekins for individual pot pies.

6. Preheat the oven to 425 degrees F.

7. Roll out the pastry into a large circle and place over the dish or cut the pastry to fit the ramekins. Press down the pastry edges, folding them as necessary. Beat together the egg and water and brush over the top of the pastry to give a nice glossy finish to the crust. Cut a few steam vents in the pastry and bake for 25 minutes until golden brown. Serves 6.

January 7, 2007

Teriyaki Flank Steak

This simple marinade is a favorite of ours. The sweetness of the honey and ginger make this flank steak irresistible. Flank steak is an affordable cut and great for serving a crowd, say, at big family barbecues. (Not to mention that it fulfills one of my New Year’s Resolutions in the kitchen…always have leftovers!)

This steak would go wonderfully with rice or stir fried vegetables, but we also enjoy it with baked potatoes or broccoli. Risotto would also go well with this since the flavors aren’t such that you have to serve it only with other Asian flavors. The key to success is to marinate the steak for at least 24 hours!

Teriyaki Flank Steak

¼ cup low-sodium soy sauce
¼ red wine or balsamic vinegar
¼ honey
2 tsp fresh ginger, minced or grated
2 tsp garlic, minced
1 green onion, sliced
1 flank steak (about 3 lbs), trimmed of most fat

Combine all marinade ingredients in a gallon size ziploc bag. Stir the honey into the other ingredients until well combined. Add the flank steak to the bag, seal and refrigerate for 24 hours.

Remove the flank steak from the marinade and pat dry. Cut the steak (against the grain) into a few pieces if you want to have some rare, medium rare or medium sections for your guests. Broil or cook on a hot grill for 4-5 minutes each side for rare to medium rare and 6-7 minutes for medium. Let it rest about 10 minutes before slicing thinly against the grain.

January 2, 2007

Happy New Year!

Well, where to begin? It’s been a long month since I’ve posted on this blog! I’ve moved to a new city, traveled back and forth between Virginia and Iowa three times this month, was out with the flu for a week and spent my first Christmas at home in 3 years. There were many ups and downs this month, but mostly it was a much needed break and a happy holiday season full of family and good times. I hope it was for you and yours!

Another occasion was marked when my blog turned 1 year old in early December! I’ve had such fun corresponding with so many readers, and, of course, cooking so many new things this past year! Thank you to everyone who reads, and all the food bloggers out there for all the inspiration!

So, I’m not the best at coming back with a bang…Usually when I take long breaks from cooking I have to ease back into it. There are times when I crave being back in the kitchen, but I most often have to start with what I know. I make easy meals that have become part of our regular rotation: meatloaf, steaks, pizza, pasta, quesadillas, etc. So, I offer you this simple baked penne. Not exactly helpful if your New Year’s resolution is to eat healthier foods, but for a housewarming gift, this really hit the spot.

Baked Penne with Sausage and Ricotta

¾ lb penne, ziti or other pasta
1 jar tomato & basil pasta sauce, or homemade sauce
8 oz ricotta cheese
¼ tsp hot pepper flakes
1 Tbsp olive oil
1 onion, chopped
1 green bell pepper, chopped
4-5 large button mushrooms, sliced
3 hot Italian pork (or turkey) sausages, casings removed
1 ½ cups shredded mozzarella
½ cup grated parmesan

Bring a large pot of water to a boil, salt the water and cook the pasta according to package directions; drain and set aside. Preheat oven to 400 degrees F.

In a large mixing bowl, mix together the jarred sauce, ricotta cheese, hot pepper flakes and ½ the parmesan cheese.

In a large skillet, sauté the onions and green peppers in the olive oil until softened. Remove to a plate. Add a touch more olive oil, if desired and sauté the mushrooms until done to your liking. Remove these from the skillet. Add the sausage and break apart with a spatula. Sauté about 7-8 minutes, or until cooked through. Remove to a paper towel lined plate to absorb the grease.

Add the onions, bell pepper, mushrooms and sausage to the bowl with the tomato sauce and ricotta cheese. Combine well. Toss the pasta into this mixture and spread half of it in a 2 quart baking dish. Top with half the mozzarella. Spread the remaining pasta in the dish and top with the remaining mozzarella and parmesan. Bake for 25 minutes until bubbly and browned on top!